
Plan / tier availability
- Available to Workspace Admins on all plans.
Integrations or dependencies
- Organizations can have up to 20 Service Keys (the limit is configurable per organization).
- Workspace Admins can only create and manage keys for their own Workspace(s).
How to Use It
1. View Service Keys
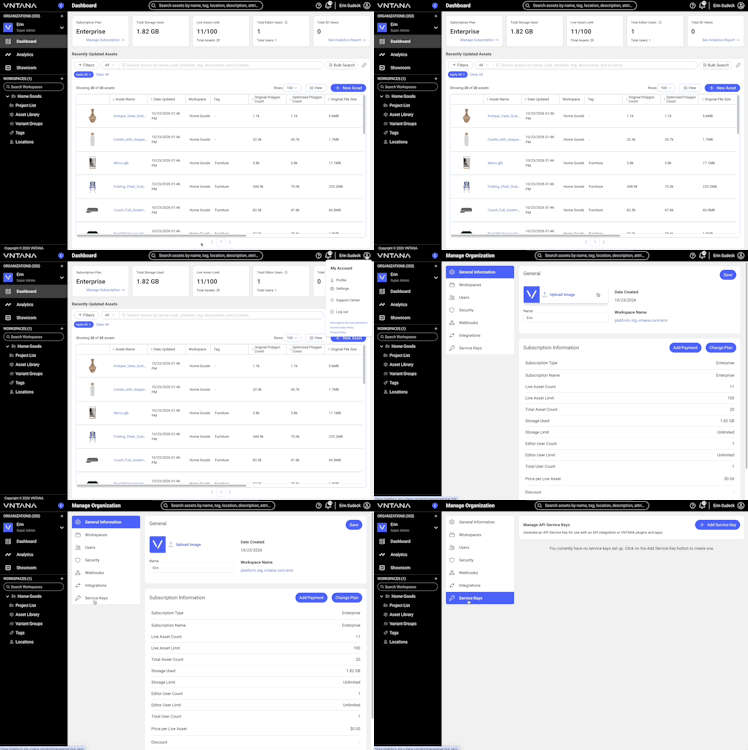
View and manage all Service Keys associated with your Organization in the Service Keys tab within the Organization Settings.
Follow these steps:
- Log into VNTANA.
- If you are a Workspace Admin or above, open the User Profile Menu.
- Select Settings.
- You will be redirected to the Organization General Information page.
- Toggle to the Service Keys tab.
- You will see a list of all Service Keys created for your Organization.
- Create a new key.
- Expand an existing key to view its details and manage it.
Important: Workspace Admins will only see Keys associated with Workspaces they have access to.
2. Create a Service Key
Create one key per integration so each integration can be managed, rotated, or removed without affecting the others.
Follow these steps:
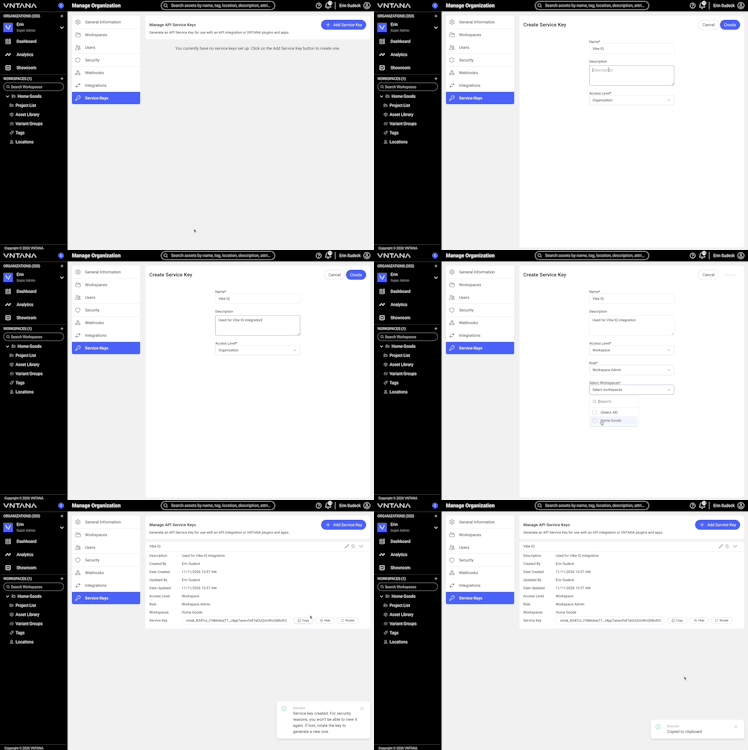
- Open the Service Keys tab.
- Click + Add Service Key.
- You will be redirected to the Create Service Key form.
- Complete the form:
- Name* — a title for the key (up to 255 characters). Tip: name it after the integration, e.g. "Vibe IQ." The name must be unique.
- Description — optional; describe how the key will be used (up to 500 characters).
- Access Level* — Organization (default) or Workspace.
- Role* — set by the Access Level (see table below).
- Workspaces* — required only for Workspace access. Select every Workspace the key should reach.
- To stop at any point, click Cancel. The in-progress key is discarded, and you return to the Service Keys list.
- Click Create.
- You will be returned to the Service Keys list. The new key is expanded, scrolled into view, and fully visible.
- Click Copy to copy the key to your clipboard, then share it with the developer who needs it.
Important: The full key is only visible right after creation. It becomes encrypted when you click Hide, collapse the accordion, refresh, or leave the page. Copy it before then. If it's lost, rotate the key to get a new one.
How Access Level and Role Work Together
|
Access Level |
Available Roles |
Workspaces |
|
Organization |
Organization Admin (set automatically, can't be changed) |
Not required — the key acts on the whole organization |
|
Workspace |
Workspace Admin, Workspace Content Manager, or Workspace Guest |
Required — select one or more |
Important: Workspace Admins can only create Workspace-level keys for the Workspaces they manage.
3.Show / Hide a Key Hint
For security, an existing key can't be viewed in full. Show reveals a short hint so you can confirm which key an integration is using.
Follow these steps:
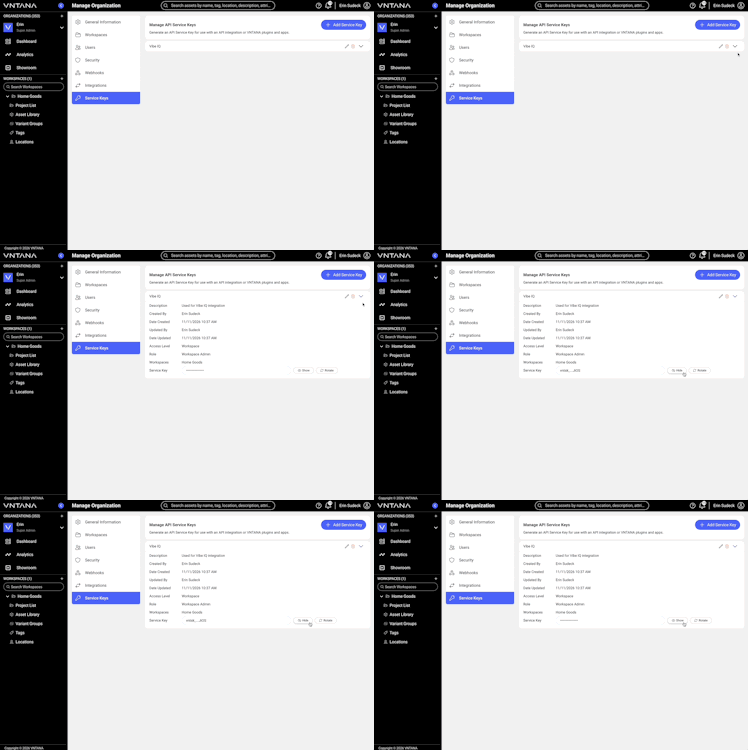
- Open the Service Keys tab.
- Expand a key by clicking its title or chevron.
- In the key details, the key is shown encrypted, with action buttons to the right.
- Click Show.
- A hint is revealed (for example
vntsk_...LeMj). - The hint stays visible until you click Hide, collapse the accordion, refresh, or leave the page.
The Copy button only appears right after a key is created or rotated. It is not available for existing keys.
4. Rotate a Key
Rotating generates a new key and immediately invalidates the old one. Use it when a key is lost, exposed, or due for a refresh.
Follow these steps:
- Open the Service Keys tab.
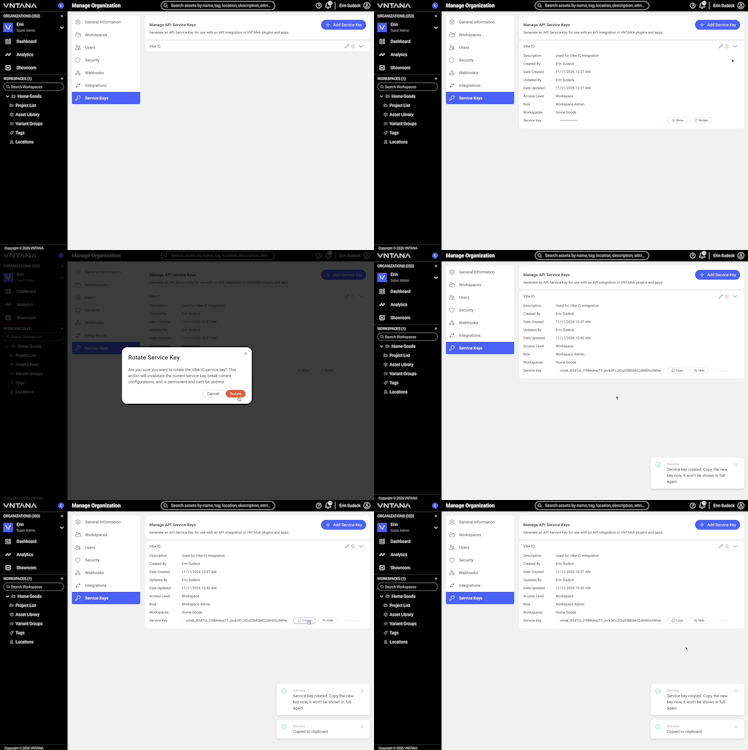
- Expand the key you want to rotate.
- Click Rotate, to the right of the key field.
- A confirmation pop-up opens.
- Select the appropriate action:
- Cancel or X: the modal closes and nothing changes.
- Rotate: the pop-up closes, a success message appears, and the new key is shown in the key field.
- Click Copy to copy the new key, then update every integration that used the old key.
- The new key becomes encrypted when you click Hide, collapse the accordion, refresh, or leave the page.
Important: Any integration using the old key stops working immediately. Coordinate with the developer before rotating.
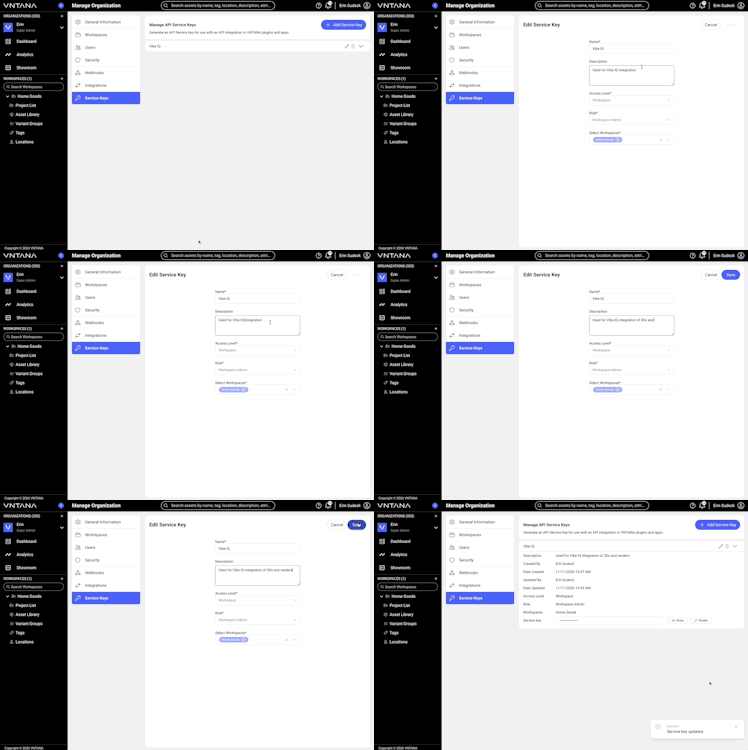
5. Edit a Key
You can update a key's Name and Description. Editing does not change the key itself, so connected integrations keep working.
Follow these steps:
- Open the Service Keys tab.
- Find the key and click the Edit (pencil) button on its accordion header.
- You will be redirected to the Edit Service Key form, pre-filled with the saved details.
- Update the Name and/or Description.
- Click Save in the upper right, or Cancel to discard changes.
- A success message appears and you return to the Service Keys list.
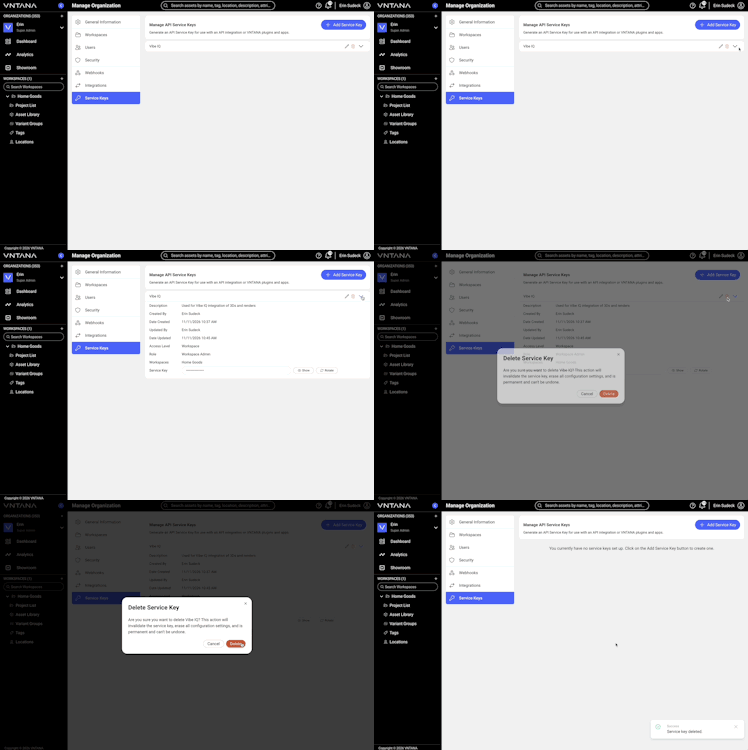
6. Delete a Key
Deleting permanently removes the key and its settings. Any integration using it stops working immediately.
Follow these steps:
- Open the Service Keys tab.
- Find the key and click the Delete (trashcan) button on its accordion header.
- A confirmation pop-up opens.
- Click Delete to confirm, or Cancel / X to keep the key.
- A success message appears and the key is removed from the list.
Developers use the key to authenticate with the VNTANA Admin API, plugins, or apps. The key works independently of any user's permissions.
How it works:
- Send the key on every request in place of a user token:
X-AUTH-TOKEN: Bearer vntsk_...
- Organization-level keys act on the key's organization.
- Workspace-level keys also need the
clientUuidheader to act on one of the key's Workspaces, for exampleclientUuid: 6c1e9f2a-3b7d-4e58-a0c4-9d2f81b7e563. - Always send keys over HTTPS, in a header — never in a URL.
Good to know:
/v1/auth/refresh-tokenand/v1/auth/logoutdo not apply to Service Keys.- Operations marked Not available to service keys return a 403.
- A rotated or deleted key stops working immediately.
Troubleshooting Basics
|
Issue |
Quick Check |
|
Service Keys tab is not visible |
Confirm you have Workspace Admin access or above. |
|
Create button is disabled |
Complete all required fields: Name, Access Level, Role, and Workspaces (if Workspace access is selected). |
|
+ Add Service Key doesn't create a new key |
The organization may have reached its key limit (20 by default). Delete unused keys or contact support. |
|
Copy button is missing |
Copy only appears right after a key is created or rotated. To get a usable key again, rotate it. |
|
Show only displays part of the key |
This is expected. Show reveals a hint (e.g. |
|
Key was lost before it was copied |
Rotate the key to generate a new one, then update the integration. |
|
API returns 401 |
Check the error: |
|
API returns 403 |
The operation is marked Not available to service keys, or the key's Role doesn't allow it. |
|
Workspace-level key returns errors or no data |
Confirm the |