
They can:
- Measure point-to-point distances on the model
- Toggle bounding box dimensions on/off
- Adjust units and precision
- Edit, delete, hide, and clear measurements
This is valuable for QA teams who need to confirm scale, accuracy, and geometry without opening a 3D software.
Plan / Tier Availability
- Available everywhere the Viewer is supported:
- Platform Viewer
- Embedded Viewer
- NPM package
Integrations or Dependencies
- Measurements are not saved, and reloads will reset measurement data.
- Not available in:
- Variant Groups
- Showrooms
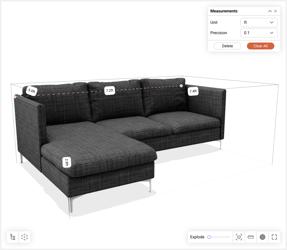
How to Use It
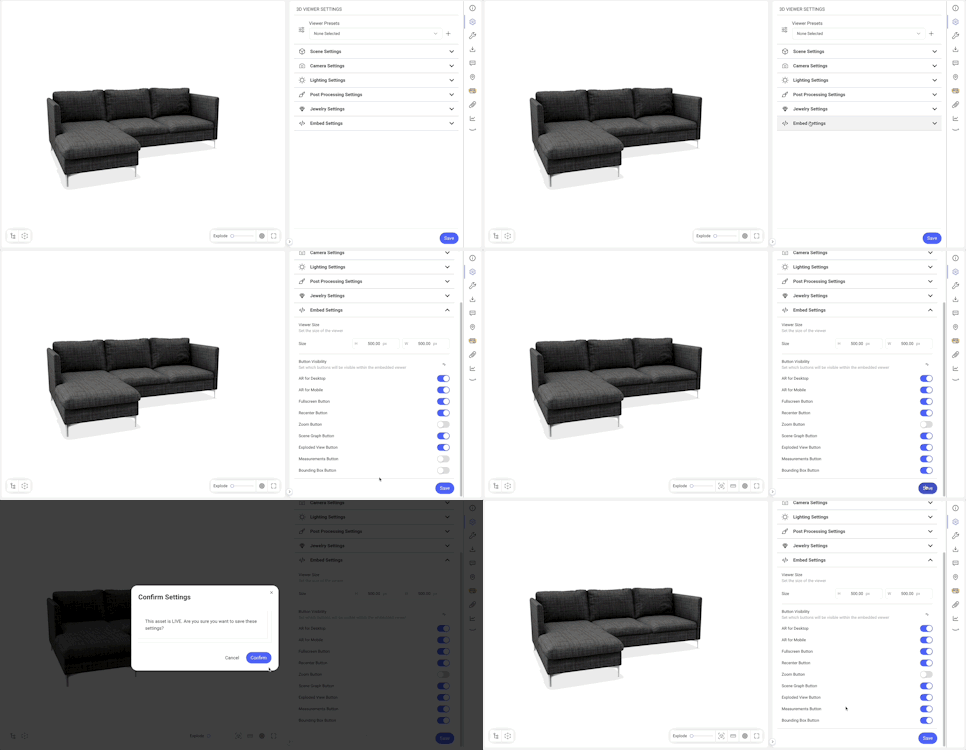
1. Enable Measurements or Bounding Box in Viewer Settings
- Open an asset.
- Go to Viewer Settings.
- Open Embed Settings.
- Toggle Bounding Box or Measurements on.
- Click Save.
- A success notification confirms that the viewer buttons are now enabled.
Bulk Editor:
- Select multiple assets → Edit → Viewer Settings → Embed Settings → toggle the same switches → Save.
2. View Bounding Box Dimensions
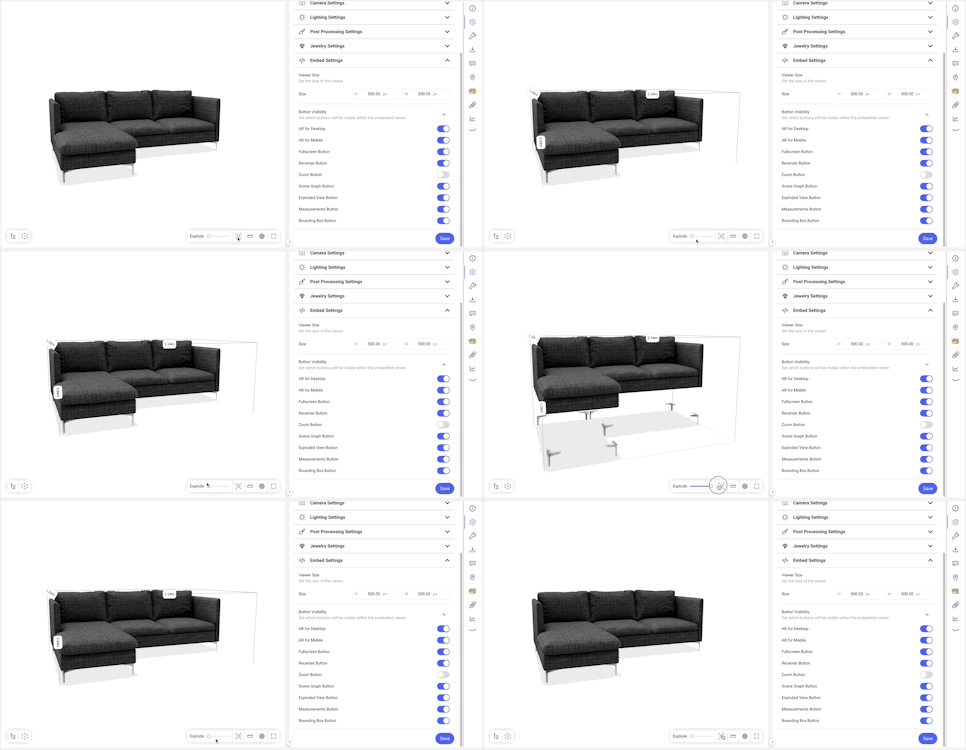
- Open an asset.
- Click the Bounding Box viewer button.
- Width, Height, and Depth labels appear around the model.
- Toggle off to hide them.
Works with:
- Exploded view
- Assets with animations
3. Add a Measurement (Point-to-Point)
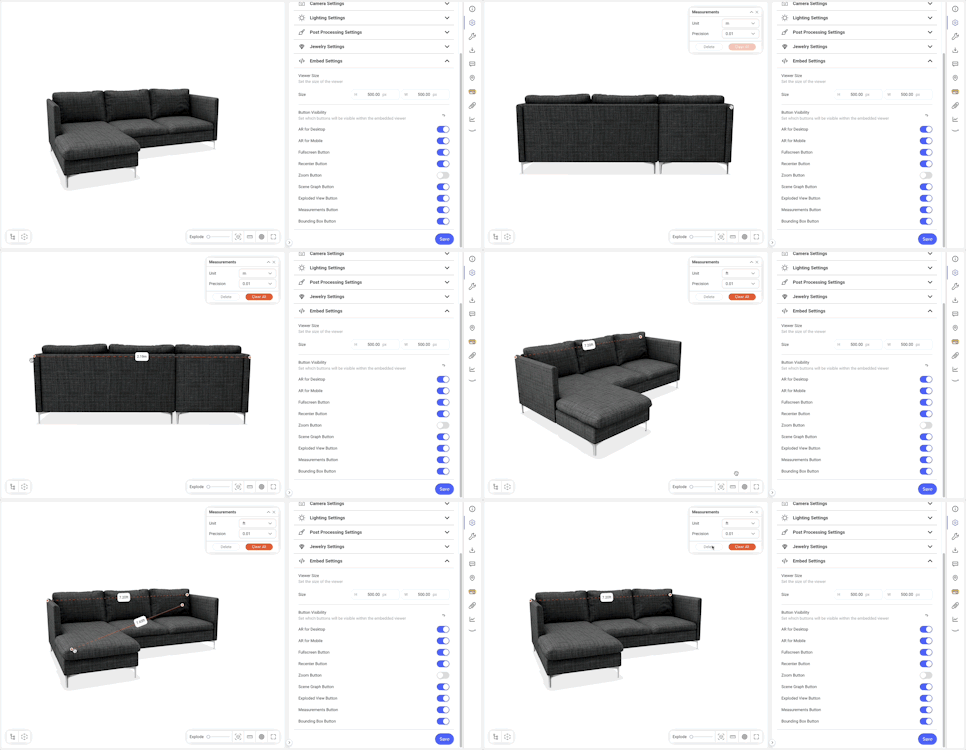
- Open an asset.
- Click the Measurements viewer button.
- The Measurements menu opens on the side in the Viewer.
- Hover over the model — the cursor will snap to faces, edges, or vertices.
- Click on the model to place Point A.
- Rotate/pan/zoom if needed before placing point B.
- Hover on the model and click to place Point B.
- Distance appears in your chosen unit and precision.
Works with:
- Exploded view, but points will not move with the mesh.
- Supports tablet input.
4. Adjust Measurement Settings
- With Measurements toggled on:
- Open the menu to change:
- Unit of Measure: meters, feet, inches, centimeters, millimeters
- Precision: 1 to 0.00001
- All existing measurements update instantly.
- Close the menu — measurements remain visible.
5. Edit a Measurement
- Select a measurement point (single click) to select it.
- The cursor will change to a move cursor (crossed arrows) to indicate you can edit the point.
- Click on the desired location to reposition the point.
- Distance updates live.
6. Hide All Measurements
- Toggle the Measurement button off in the Viewer. Toggle back on to show again.
- Close the Measurement Settings menu by clicking the close (“X”) icon.
7. Delete or Clear Measurements
- Delete: Select a measurement, then press keyboard Delete OR click Delete button within the Measurement Settings menu to delete a single measurement.
- Clear All: Click the Clear All button in the Measurement Settings menu to delete all measurements.
Troubleshooting Basics
Common Issues & Quick Checks
|
Issue |
Quick Check |
|
Measurements disappear |
Confirm they toggled off/on, or the Viewer was reloaded; measurements are not saved. |
|
User can’t place points |
Depending on the mesh density, the user may need to zoom in when placing a point. |
|
Measurement doesn’t move in exploded view |
Expected — measurements do not follow geometry when the exploded slider changes. |
|
Bounding Box / Measurement buttons missing |
Check Viewer Settings → Embed Settings toggles → ensure they’re turned on and saved. |