
It allows users to:
- Set the default starting angle
- Control zoom, pan, rotate
- Enable auto-rotate
- Adjust field of view
- Save everything into Viewer Presets
- Bulk edit across assets
This ensures consistent viewing experiences across assets.
Major Benefits
- “Set From View” = fast setup
- Embed settings now persist
Plan / Tier Availability
- Available to all platform users and custom integrations via the NPM package.
Integrations or Dependencies
- Camera settings can only be adjusted on the Asset Details page or by editing the Viewer config.
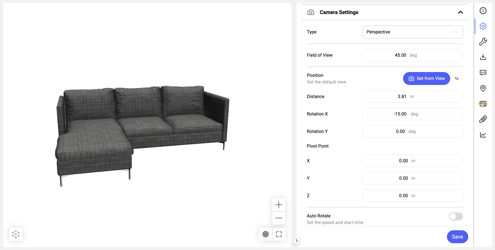
How to Use It
When adjusting Viewer Settings, click the Save button at the bottom of the panel to officially save all changes.
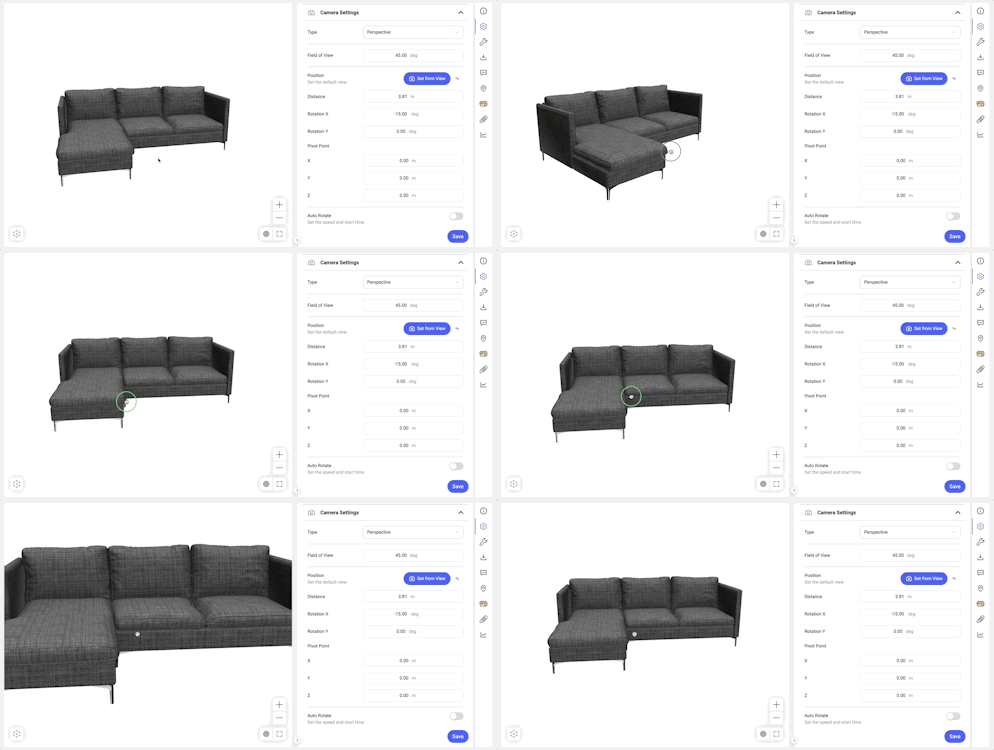
The Viewer navigation supports rotate, pan, and zoom.
- Rotation = the ability to rotate the camera in the viewer (left click and drag to rotate).
- Pan = the ability to move the camera in the viewer (right click and drag/ left click + alt/shift/ctrl/cmd and drag/ double tap and drag to pan).
- Zoom = the ability to move the camera closer or farther away in the viewer (scroll to zoom).
To edit the Camera Settings of the Viewer, navigate to Viewer Settings → Cameras.
The following settings can be adjusted:
- Camera Type
- Position
- Auto Rotate
- Mouse Controls
Camera settings can be applied in:
- Viewer Presets
- Bulk Edit
The following Viewer Settings were also updated:
- Scene
- Embed
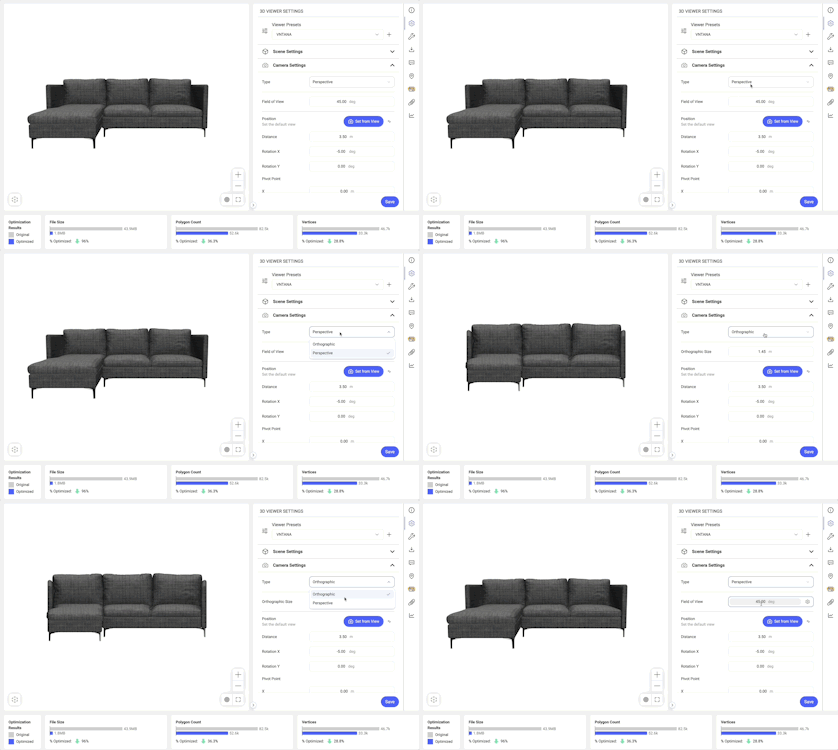
1. Camera Type
Location: Viewer Settings → Cameras → Type
Follow the steps below to change the camera type within the Viewer.
- Open the Camera Type menu.
- Select from the available options.
- Perspective = Realistic depth.
- Orthographic = Flat, no depth distortion.
- Once a type is selected, the Viewer will update automatically.
- Click Save.
Notes:
- Perspective is used by default.
- Orthographic disables the Show Environment Map switch.
2. Field of View (FoV)
Location: Viewer Settings → Cameras → Field of View
Follow the steps below to adjust the field of view (controls how wide or zoomed the camera feels).
- Click on the FoV field and enter a value. Press Enter on your keyboard or click the checkmark button to confirm the value change.
- Alternatively, hover on the FoV field until you see the double arrow cursor, then slide to your desired value.
- The Viewer will update instantly.
- Click Save.
Min and Max degrees can also be set for FoV. Follow the steps below to adjust.
- Hover on the FoV field.
- Click the gears icon to open the FoV settings menu.
- Set the min and max as needed.
- Click the close icon to close the settings menu.
Reset the FoV settings by following the steps below.
- Open the FoV settings menu (click the gears icon in the FoV field).
- Hover on the min / max field. You will see a reset arrow appear.
- Click the reset arrow to reset the individual min and max fields or,
- Click the Reset button at the bottom of the menu to reset FoV to the last saved Viewer Settings.
Notes:
- Zooming in the Viewer changes both Distance and FoV.
- When using default Min/Max, Distance auto-adjusts with FoV.
- Lock FoV by setting Min = Max.
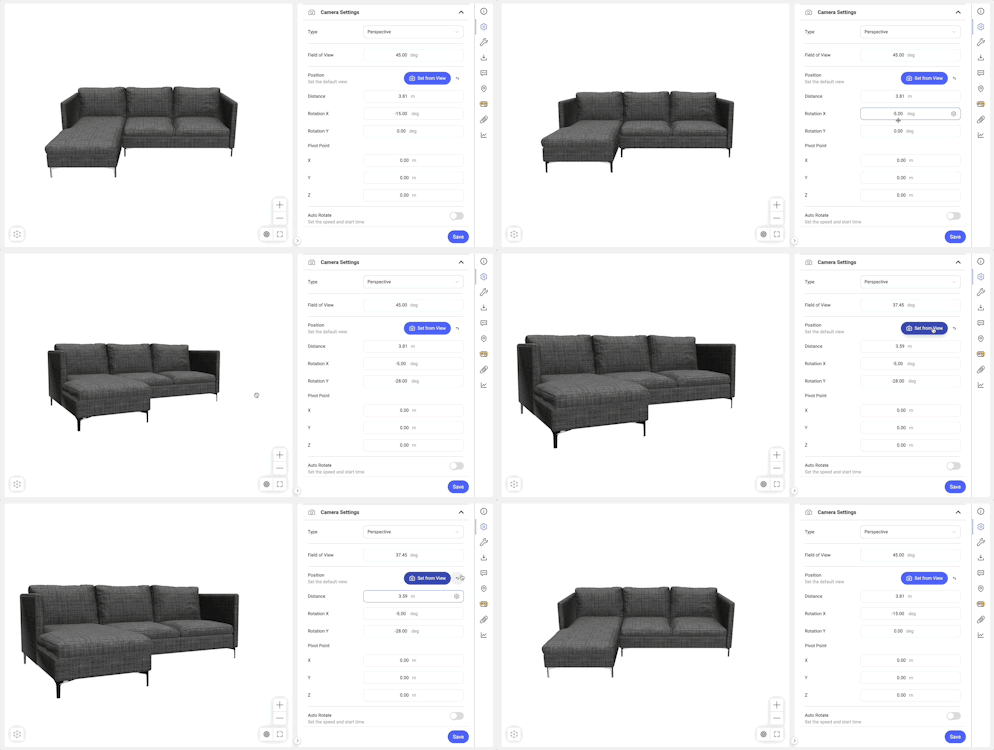
3. Set Initial Camera Position
Location: Viewer Settings → Cameras → Position
Follow the steps below to set the default view when the Viewer loads.
Best Practice (Fastest Method): Use Set From View
- Position the asset in the viewer to the desired starting view.
- Open Viewer Settings → Cameras → Position.
- Click the Set From View button.
- What updates: FoV/ Orthographic Size, Distance, X Rotation, Y Rotation, Pivot Point (X, Y, Z).
- Click Save.
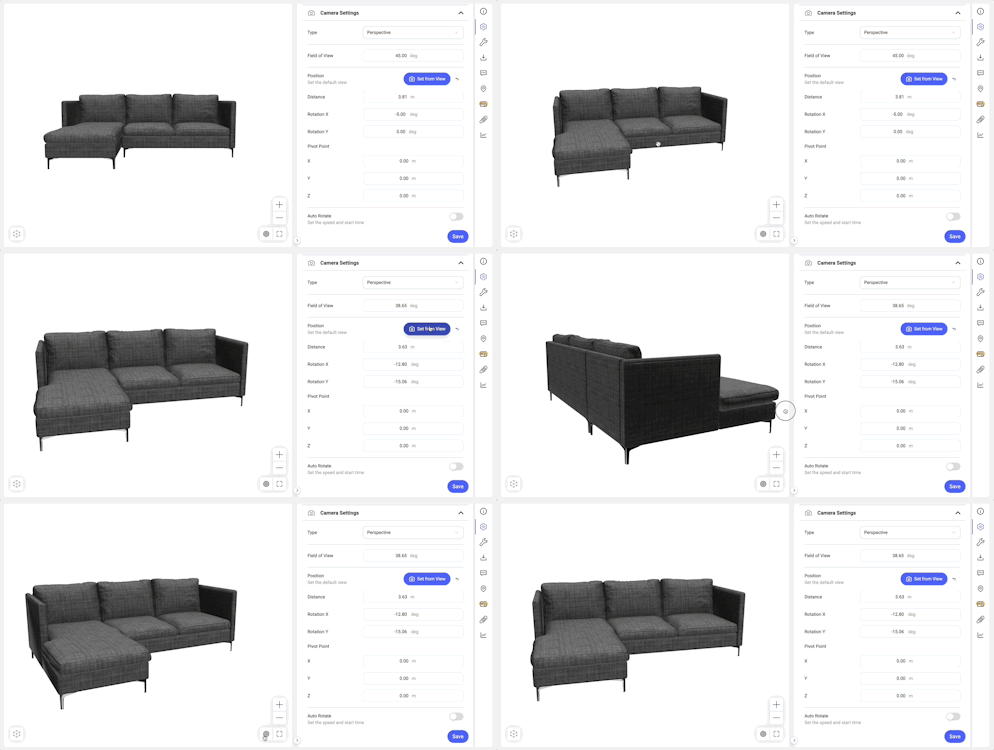
Manually Edit Camera Position
- Open Viewer Settings → Cameras → Position.
- Input a value or slide to your desired value within each field.
- Distance = How close the camera is to the asset. The camera will zoom in or out as it is adjusted.
- Rotation X = Position of the camera vertically. The camera will move up or down as it is adjusted.
- Rotation Y = Position of the camera horizontally. The camera will move left or right as it is adjusted.
- Pivot Point = Position of the camera from the center point of the viewer. The asset’s location will visually change as these settings are adjusted.
- Adjust the min and max values for the below settings within their individual settings menus (gear icon within the field).
- The Pivot Point settings do not support min and max values.
- Reset the individual settings to the last saved Viewer Settings by clicking the reset arrow within each field (Distance, Rotation X, and Rotation Y reset buttons are located within the Settings menu).
- Reset all of the Position settings to the last saved Viewer Settings by clicking the reset arrow to the right of the Set From View button.
- Click Save.
Notes:
- Lock Distance by setting Min = Max.
- Drastically changing distance may introduce perspective distortion.
4. Auto Rotate
Location: Cameras → Auto Rotate
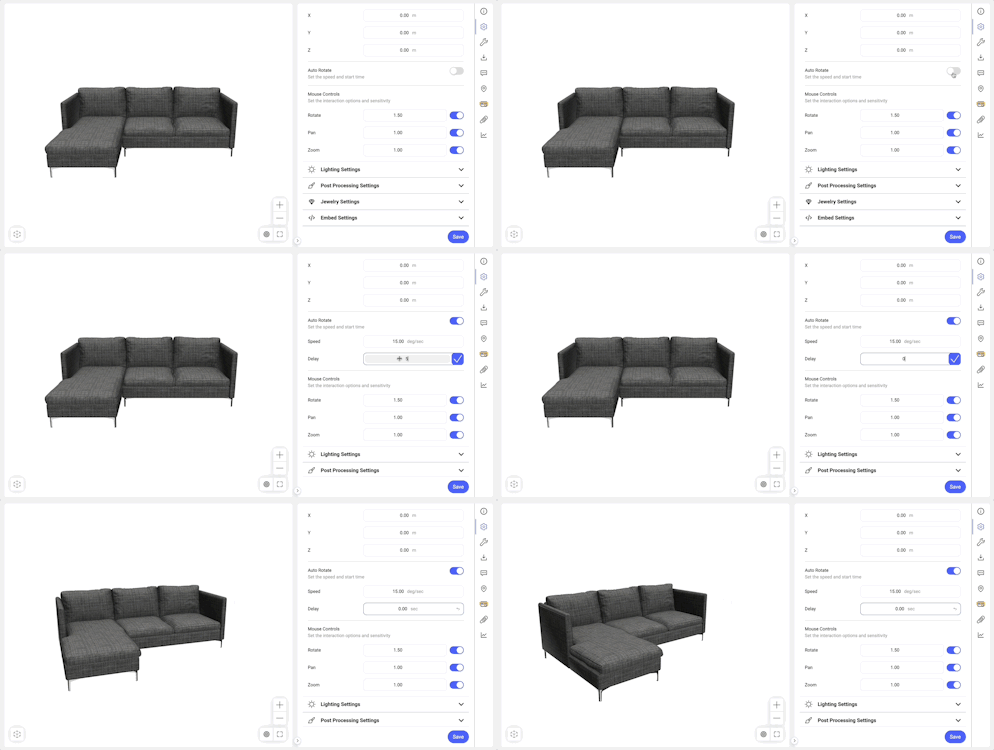
Follow the steps below to enable automatic spinning of the asset.
- Open Cameras → Auto Rotate
- Toggle the Auto Rotate switch on.
- Adjust the Speed and Delay as desired.
- Reset the individual settings by clicking the Reset arrow on the field.
- Click Save.
5. Mouse Controls (User Interaction)
Location: Cameras → Mouse Controls
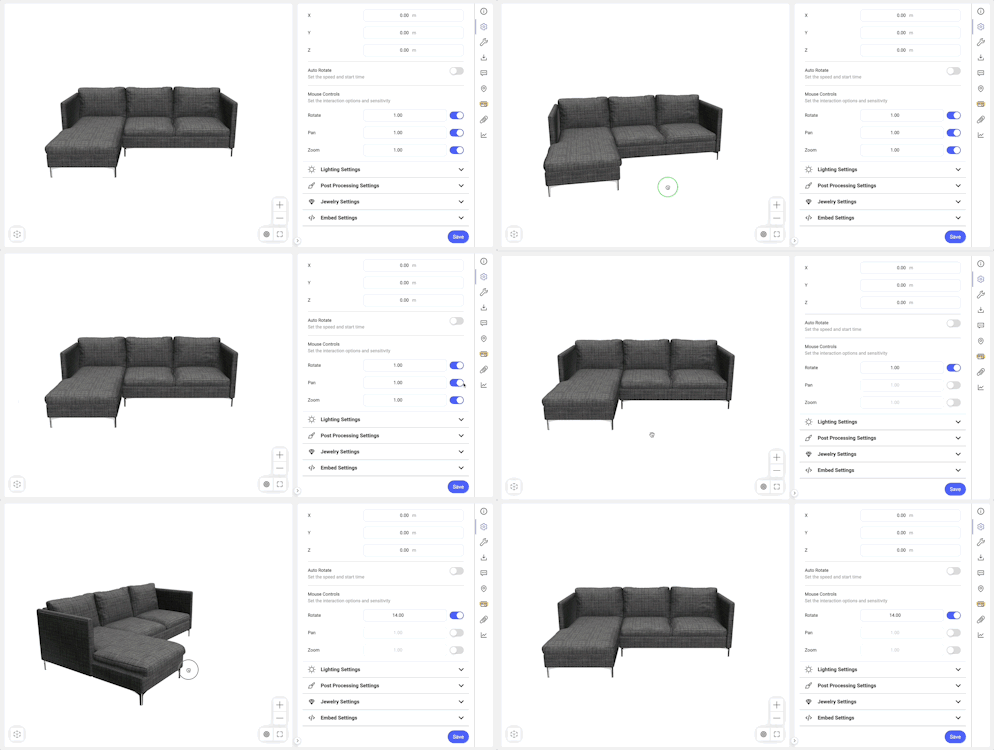
Follow the steps below to manage the camera interactions available in the Viewer and their sensitivity.
- Open Cameras → Mouse Controls
- Modify the Rotate, Pan, and Zoom sensitivity as desired by inputting a value or sliding to the desired value.
- Reset the individual settings by clicking the Reset arrow within each field.
- Disable Rotate, Pan, and Zoom by toggling the switch off.
- Click Save.
6. Viewer Presets
Camera settings can be saved in Viewer Presets:
- Adjust the Camera settings.
- Click + next to Viewer Presets.
- The Create Viewer Preset form will open. Complete the form.
- Click Save.
Saved in Viewer Presets
✔ Cameras
✔ Lighting
✔ Post Processing
✔ Jewelry
✔ Embed → Buttons
Not Saved:
✘ Scene Rotation
✘ Embed → Viewer Size
7. Bulk Edit Camera Settings
Follow the steps below to bulk adjust Camera Settings.
- Select assets in the Asset Library.
- Click Edit. The Bulk Edit form will open.
- Open Viewer Settings → Camera Settings.
- Click the + button next to the Camera Settings that need to be adjusted and applied to the selected assets.
- Modify the settings as needed.
- Click Submit.
8. Scene Rotation (Model Orientation)
Location: Viewer Settings → Scene → Rotation
⚠ Important Difference:
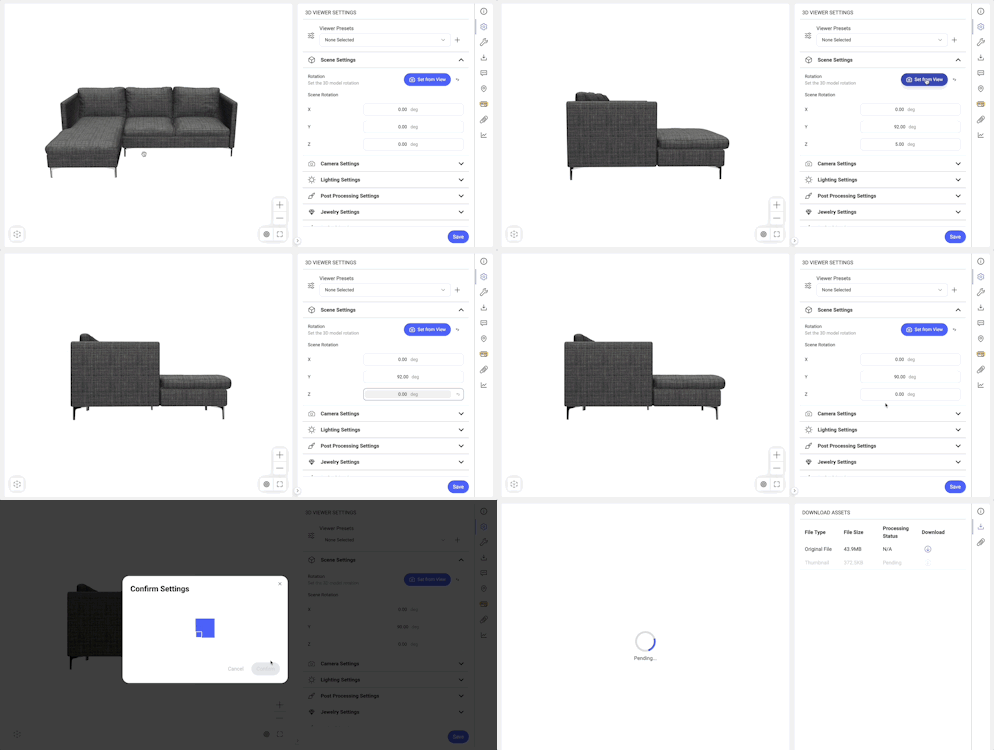
Scene Rotation rotates the model itself, not the camera.
To adjust the model's orientation in the optimized GLB, which is used in the Viewer, follow the steps below.
- Open Viewer Settings → Scene.
- Position model in the Viewer.
- Click the Set From View button.
- What changes: Scene Rotation X, Y, and Z.
- Inspect the Rotation X, Y, and Z values.
- Zero out unwanted axis changes.
- Alternatively, skip steps 2 - 5 and manually adjust the Rotation X, Y, and Z fields.
- Reset the individual settings to the last saved value by clicking the Reset arrow within the field.
- Reset all of the Rotation settings to the last save values by clicking the Reset arrow to the right of the Set From View button.
- Click Save (the asset reprocesses).
9. Embed Options (Now Persistent)
Location: Viewer Settings → Embed
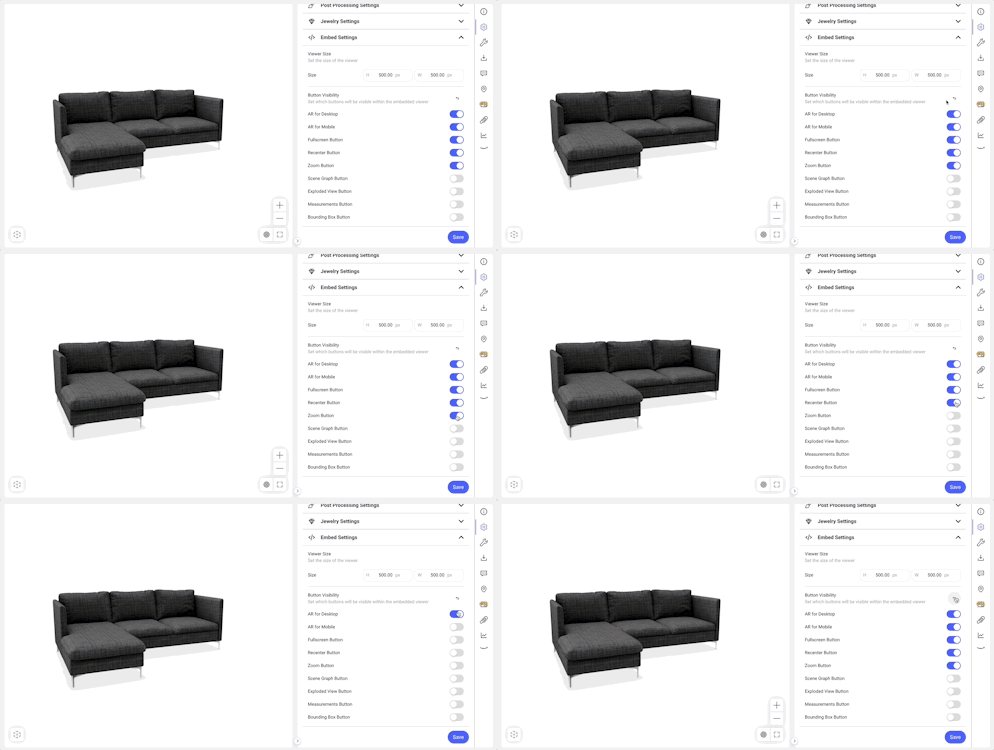
Follow the steps below to manage which buttons are available in the Viewer.
- Open Viewer Settings → Embed.
- Viewer Size: adjust the viewer dimensions by entering the desired values for height and width.
- Button Visibility: Toggle the switches on / off for the buttons that should be visible the Viewer.
- AR for Desktop = Allow users to view the asset in AR when they are viewing the Viewer on a desktop device.
- AR for Mobile = Allow users to view the asset in AR when they are viewing the Viewer on a mobile device.
- Fullscreen Button = Allow users to view the asset in Full Screen.
- Recenter Button = Allow users to recenter the asset to the initial Camera Settings.
- Zoom Button = Allow users to zoom in and out of the asset with + / - buttons in the Viewer.
- Scene Graph Button = Allow users to view the asset’s mesh hierarchy in the Viewer and isolate individual parts.
- Exploded Viewer Button = Allow users to explode the asset in the Viewer by adjusting the slider. Parts are evenly distributed from the center point.
- Bounding Box Button = Allow users to view the asset’s bounding box dimensions within the Viewer.
- Measurements Button = Allow users to measure distances on the asset in the Viewer.
- Reset the Button Visibility to the last saved Viewer Settings by clicking the Reset arrow to the right of the Button Visibility title.
- Click Save.
Note:
- If the Button Visibility settings are changed after the Viewer has been embedded on a website, the embedded viewer will update automatically once the Button Visibility settings are saved.
- If the Jewelry Viewer Preset is used, the AR for Desktop and Mobile buttons will be disabled.
Troubleshooting Basics
|
Issue |
Solution |
|
Camera looks “off” |
|
|
FoV not adjustable |
Min and Max are likely the same (locked) |
|
Environment map missing |
Orthographic camera selected |
|
Viewer not updating |
Settings changed but Save not clicked |